You've noticed a faint stain on the ceiling below the bathroom, or there's a damp smell beside the tub that won't go away. The drain looks normal from above, but somewhere underneath, water is escaping. Before you reach for a wrench, find out whether you're dealing with the drain, the overflow, or water getting behind the shower wall.
Knowing how to fix a leaky bathtub drain starts with separating those possibilities. A fresh drain flange won't fix an overflow gasket, and extra sealant won't stabilize a moving waste pipe.
Table of Contents
- Why a Small Bathtub Drain Leak Turns Costly Fast
- Pinpoint the Leak Before You Remove Anything
- Gather Your Tools and Prep the Tub Safely
- Reseal the Drain Flange and Waste Shoe
- Replace the Overflow Gasket and Stopper Seal
- Test the Repair and Inspect for Hidden Damage
- Know When a Bathtub Drain Leak Needs a Plumber
Why a Small Bathtub Drain Leak Turns Costly Fast
A ceiling stain doesn't necessarily sit directly beneath the failed fitting. Water can escape below the tub and travel into surrounding flooring or framing before you notice it. That makes guessing from the stain alone a poor way to choose a repair.
There's also an important distinction between water leaking past the stopper and water leaking outside the plumbing. A worn stopper may let bathwater disappear down the drain without wetting the building. A failed flange, overflow gasket, or pipe connection can discharge that water into concealed spaces.
Why prompt diagnosis matters
The EPA estimates that household leaks waste nearly 1 trillion gallons annually nationwide, and the average household can lose more than 9,300 gallons each year, according to its Fix a Leak Week guidance. Those figures cover household leaks broadly, not bathtub drains specifically. They aren't an estimate of what your tub is wasting.
For a bathtub leak, the immediate concern is often where the escaped water goes. Wet drywall, insulation, subflooring, or framing needs attention even if the visible drip seems small.
Practical rule: If water is reaching the building structure, stop normal use of the tub. Testing should be controlled diagnosis, not another bath.
A leak that appears only while the tub drains points more strongly toward the waste assembly than the supply plumbing. That's a useful starting clue, but it doesn't identify the exact joint.
The sensible repair sequence is straightforward:
- Locate the failure: Observe the plumbing under separate water conditions.
- Repair the affected component: Replace the failed seal or fitting instead of covering the symptom.
- Verify the result: Check the assembly under standing-water and draining conditions before closing access.
Pinpoint the Leak Before You Remove Anything
Start with a flashlight and a dry inspection area. Open the existing access panel or inspect from below where it's safely accessible. Place paper towels beneath exposed connections so the first wet spot is easier to identify.
Stop a test as soon as you confirm leakage. There's no benefit in sending more water into the ceiling to prove what you've already seen. If you can't observe the plumbing or distinguish the source, residential water leak detection is a better next step than blind disassembly.
Separate the water paths
Test the drain path first. With the stopper open, pour a small, controlled amount directly into the drain while keeping the surrounding tub bottom dry. Watch the waste shoe and accessible piping. Leakage identifies a drain-path problem, although a narrowly directed stream may not fully test the flange-to-tub seal.
Test the standing water and overflow. Close the stopper, fill below the overflow, and inspect. If that remains dry, cautiously raise the level until water enters the overflow opening. A leak beginning only then points toward the overflow gasket, elbow, or riser. Don't leave the filling tub unattended.
Test full discharge, then shower spray separately. Release the bathwater and operate the stopper while watching underneath. After inspecting and drying the area again, direct shower spray onto the walls and tub-to-tile joint as a separate check. Avoid combining these conditions, because you'll lose the ability to tell which water path caused the leak.
The distinction between leakage below the overflow and leakage after water enters it is particularly useful, as described in this bathtub overflow diagnostic guide.
Match the Leak to Its Likely Source
| When Water Appears Below | Most Likely Source | Where to Check |
|---|---|---|
| During direct pouring into the drain | Drain connection, waste shoe, or associated gasket | Beneath the tub outlet and around the waste fitting |
| With water standing below the overflow | Flange seal or waste-shoe gasket | Underside of the tub drain |
| Only when water reaches the overflow | Overflow gasket, elbow, or riser | Behind the overflow plate and along its pipe |
| During full draining | Slip joint, cracked waste-and-overflow fitting, trap, or branch connection | Each accessible joint below the tub |
| During wall or tub-edge spray | Tub-edge seal, grout, faucet, or shower-valve area | Wall cavity and tub perimeter |
These are likely sources, not automatic diagnoses. Watch for where water first emerges rather than where it eventually drips. The separation of drain, overflow, and wall-spray conditions is also outlined in this bathtub leak troubleshooting guidance.
Gather Your Tools and Prep the Tub Safely
Buy replacement parts after identifying the assembly, rather than because the chrome finish looks similar. The gasket's shape, seating surfaces, and connection arrangement matter more than appearance.
Have the following ready before opening anything:
- Drain key or internal drain wrench: Use a tool that engages the drain internally rather than levering against the visible flange.
- Screwdrivers and adjustable pliers: Match the overflow screws and use pliers only where the fitting permits.
- Flashlight and towels: Keep the work visible and distinguish fresh leakage from leftover water.
- Compatible replacement gaskets: Match the waste-shoe gasket, overflow gasket, or stopper seal to the installed assembly.
- Approved sealing material: Choose plumber's putty or 100% kitchen-and-bath silicone according to the tub and drain manufacturer's instructions.
- Surface protection: Cover the tub where tools will rest so a dropped wrench doesn't damage the finish.
Make access and chemical safety part of the job
Don't disassemble a drain containing standing water after chemical drain cleaner has been used. Corrosive residue may remain, making an otherwise ordinary gasket replacement hazardous. Tell the plumber what product was used if you need help.
Plan how you'll support and inspect the plumbing underneath before loosening the flange. If removing it could leave the waste shoe hanging out of reach, you don't yet have adequate access.
A fitting that won't move is a reason to reassess the job, not automatically a reason to use a longer wrench.
In Las Vegas Valley homes, hard-water mineral buildup and aging components can make removal stubborn. MG Plumbing Services encounters these conditions in local residential plumbing. Don't confuse a fitting held by scale with one that can safely tolerate more force.
Reseal the Drain Flange and Waste Shoe
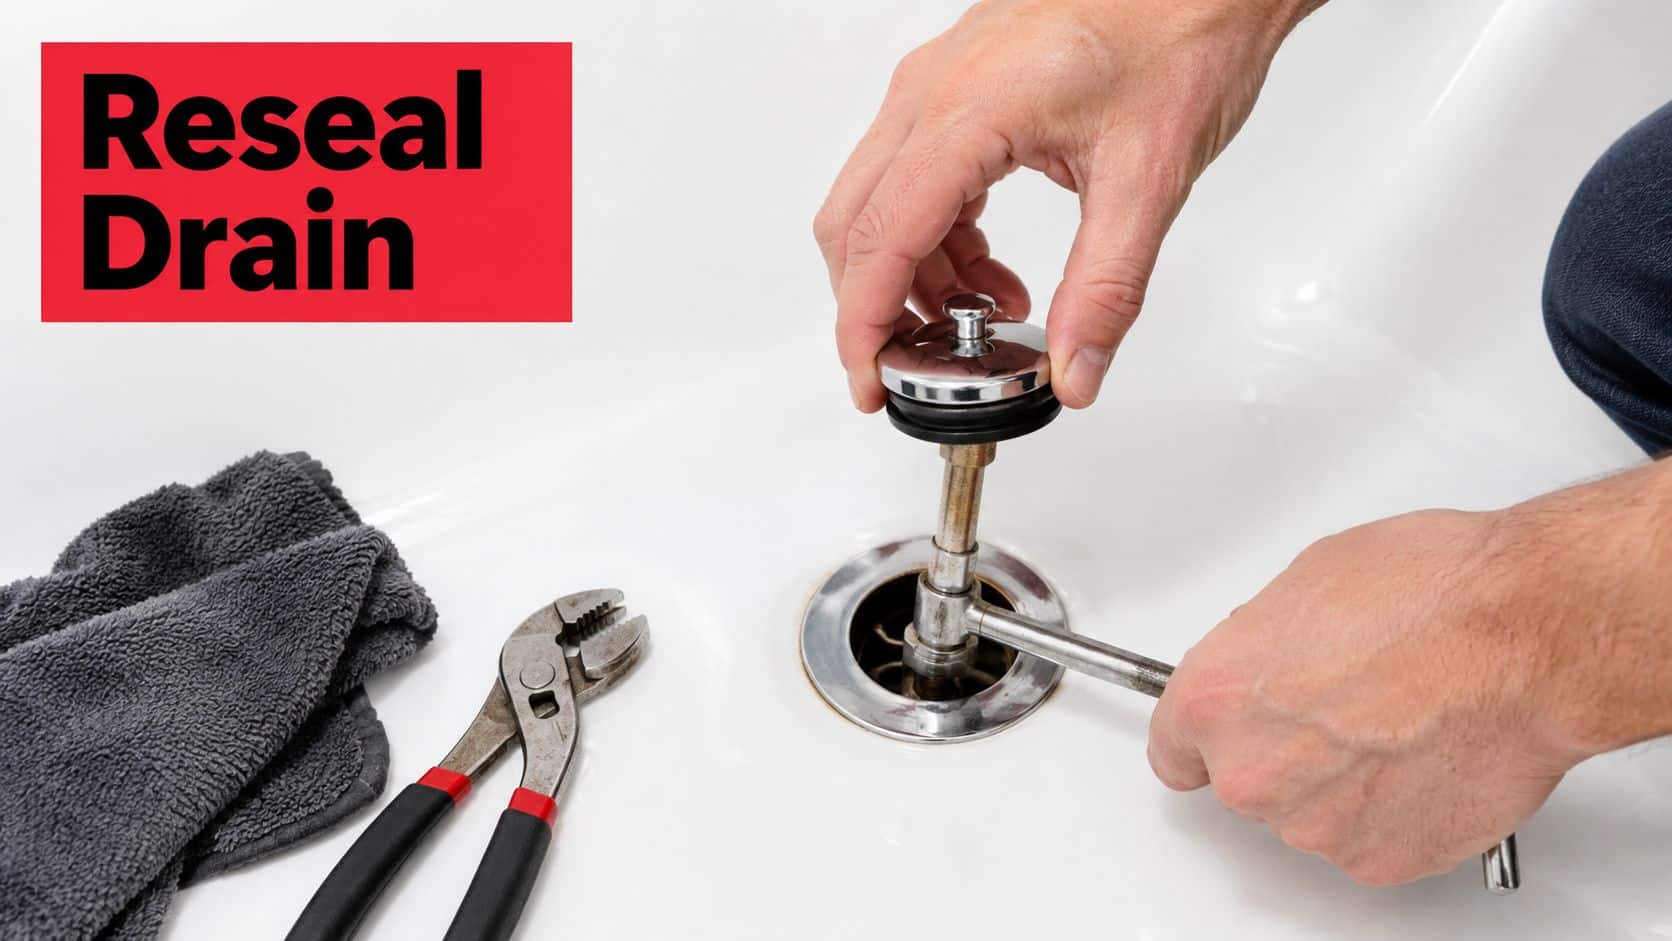
Proceed with this repair only when testing points toward the tub outlet. The drain flange is the fitting visible inside the tub; the waste shoe is the fitting beneath it. The underside gasket must seat correctly as part of the repair.
Use a properly engaged drain tool rather than gripping the finished rim.
Remove the flange without moving the piping
Remove the stopper according to its mechanism, exposing the drain's internal engagement points. Fit the drain key or internal wrench securely, support the waste shoe where accessible, and back the flange out carefully.
Stop if the piping rotates with the flange, the tub flexes, or the tool begins damaging the drain. A seal replacement becomes a different job when the assembly underneath starts moving.
Waterworks' waste-and-overflow installation guidance emphasizes compatible components, adequately supported rough-in piping, and checking every connection after installation. Those details matter just as much during a repair as during a new installation.
Clean and rebuild the sealing surfaces
Remove old putty, silicone, mineral scale, and corrosion from the flange and tub's mating surface without gouging the finish. Don't leave ridges of old sealant beneath new material. A clean, flat seating area gives the replacement seal a chance to compress uniformly.
Inspect the rubber gasket between the underside of the tub and the waste shoe. Replace it if it's flattened, hardened, split, or displaced. If you can't position the new gasket properly from above, obtain access below rather than trying to compensate with extra sealant.
Follow this reassembly sequence:
- Confirm compatibility: Check the tub and drain instructions before choosing putty or silicone, especially with acrylic or fiberglass fixtures.
- Form a complete seal: Apply a continuous, even ring of the approved material beneath the flange, without gaps.
- Seat the underside gasket: Keep it aligned between the tub and waste shoe.
- Tighten evenly: Compress the gasket without forcing the shoe out of position or distorting the assembly.
- Clean the excess: Remove squeeze-out and leave the connection undisturbed for the required cure.
One bathtub installation specification requires 100% kitchen-and-bath silicone beneath the flange and a 24-hour cure before water testing. That is a fixture-specific requirement, not permission to assume every tub uses the same sealant or cure schedule.
The video provides an additional visual reference for working at the drain.
Don't finish by smearing caulk around the visible flange. Surface caulk doesn't replace a correctly seated underside gasket, and it won't correct unsupported piping. A durable repair needs sound parts, clean surfaces, suitable sealant, and a stable connection.
Replace the Overflow Gasket and Stopper Seal
An overflow leak can stay unnoticed through ordinary showers because the bathwater never reaches that opening. If your controlled test isolated this area, leave the floor drain alone and work on the overflow assembly.
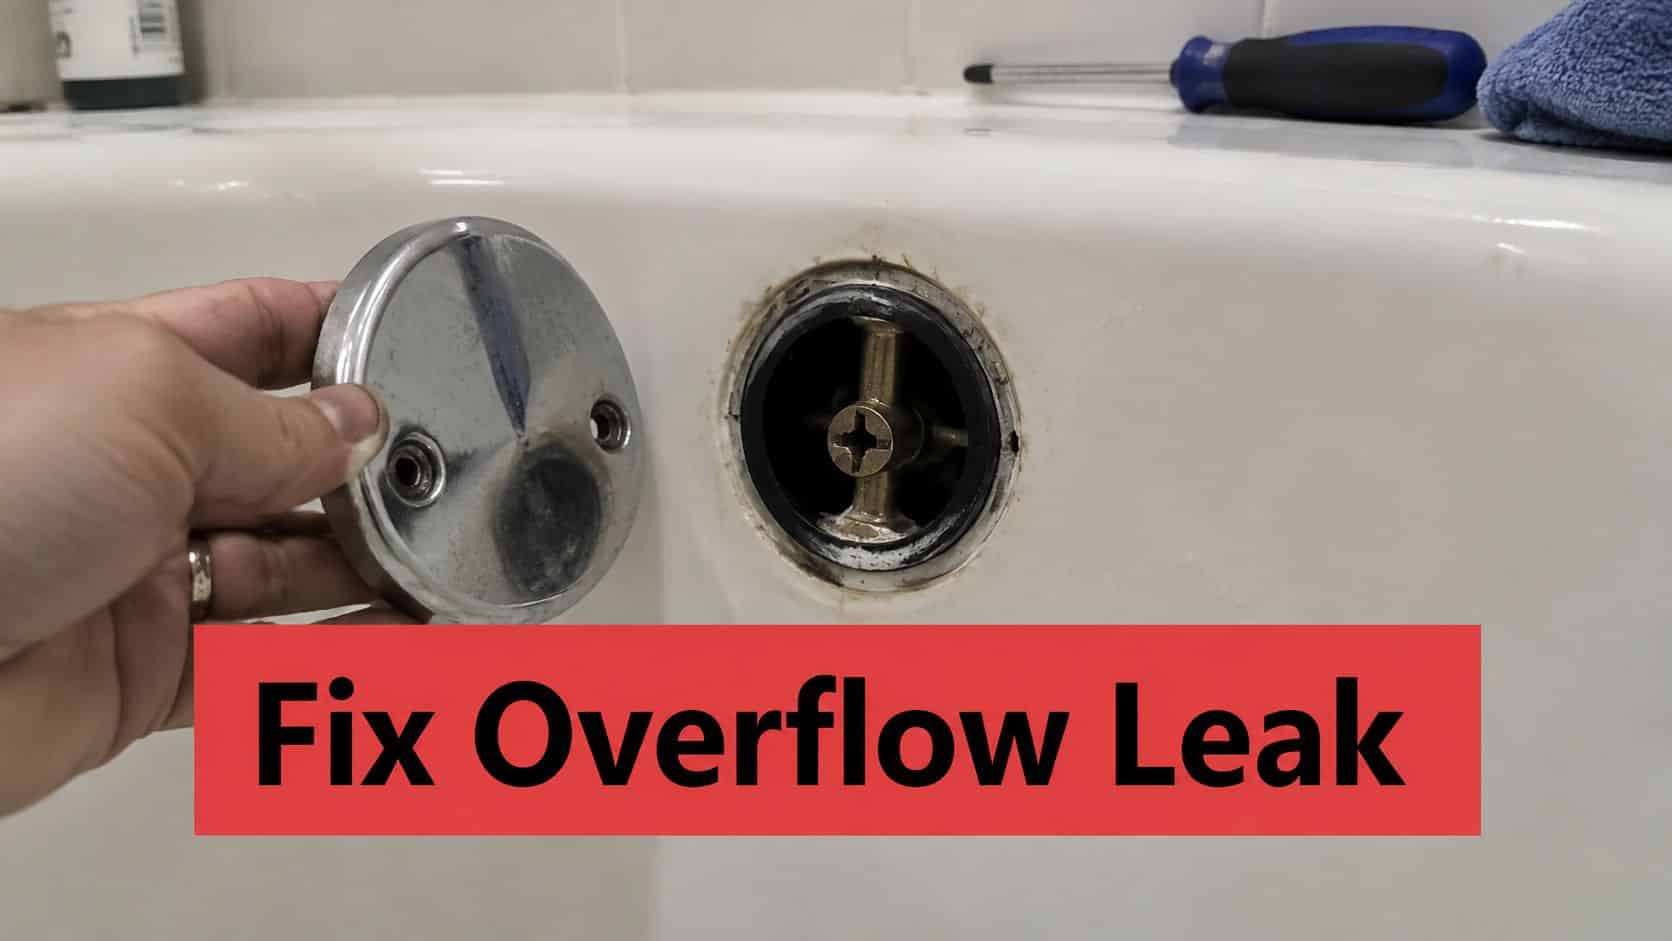
The overflow gasket sits between the back of the tub wall and the overflow elbow. The cover screws draw the elbow toward the tub, compressing the gasket against the curved surface. Cracking, hardening, displacement, or loss of compression can let water escape behind the tub, as explained in this overflow gasket repair guide.
This is the access point for the cover and any attached stopper linkage.
Support the elbow before removing the cover
Loosen the plate screws carefully while keeping control of the assembly behind it. If a trip-lever linkage is attached, withdraw it gently rather than bending it to clear the opening. Don't allow an unsupported elbow to drop behind the tub.
Clean both gasket-contact surfaces and compare the replacement with the original assembly. Install it in the manufacturer-specified orientation. A tapered gasket must match the tub's shape; don't assume either face can go against the wall.
Use these checks during reassembly:
- Gasket position: It should sit evenly without folding or slipping away from the opening.
- Screw pressure: Tighten evenly and snugly, not hard enough to distort the plate or elbow.
- Assembly stability: If the elbow won't remain aligned, stop and address its support or access.
- Linkage movement: Confirm that any attached mechanism operates without binding.
Distinguish stopper leakage from building leakage
A stopper that won't hold a bath may need its own gasket replaced or its linkage adjusted. Inspect the sealing edge for wear and check the mechanism for damage before replacing unrelated drain parts.
The functional distinction matters: water passing a closed stopper should still remain inside the drainage system. Water outside that system is a separate failure. Plumbing provisions require a watertight bathtub stopper and an approved waste connection, as reflected in these bathtub waste-outlet requirements.
Don't tighten the overflow plate harder merely because the stopper still leaks. The plate's gasket and the stopper perform different jobs.
Test the Repair and Inspect for Hidden Damage
Wait for the specified sealant cure before introducing water. Keep the access panel open and arrange a clear view of the repaired connection, including the ceiling below where applicable.
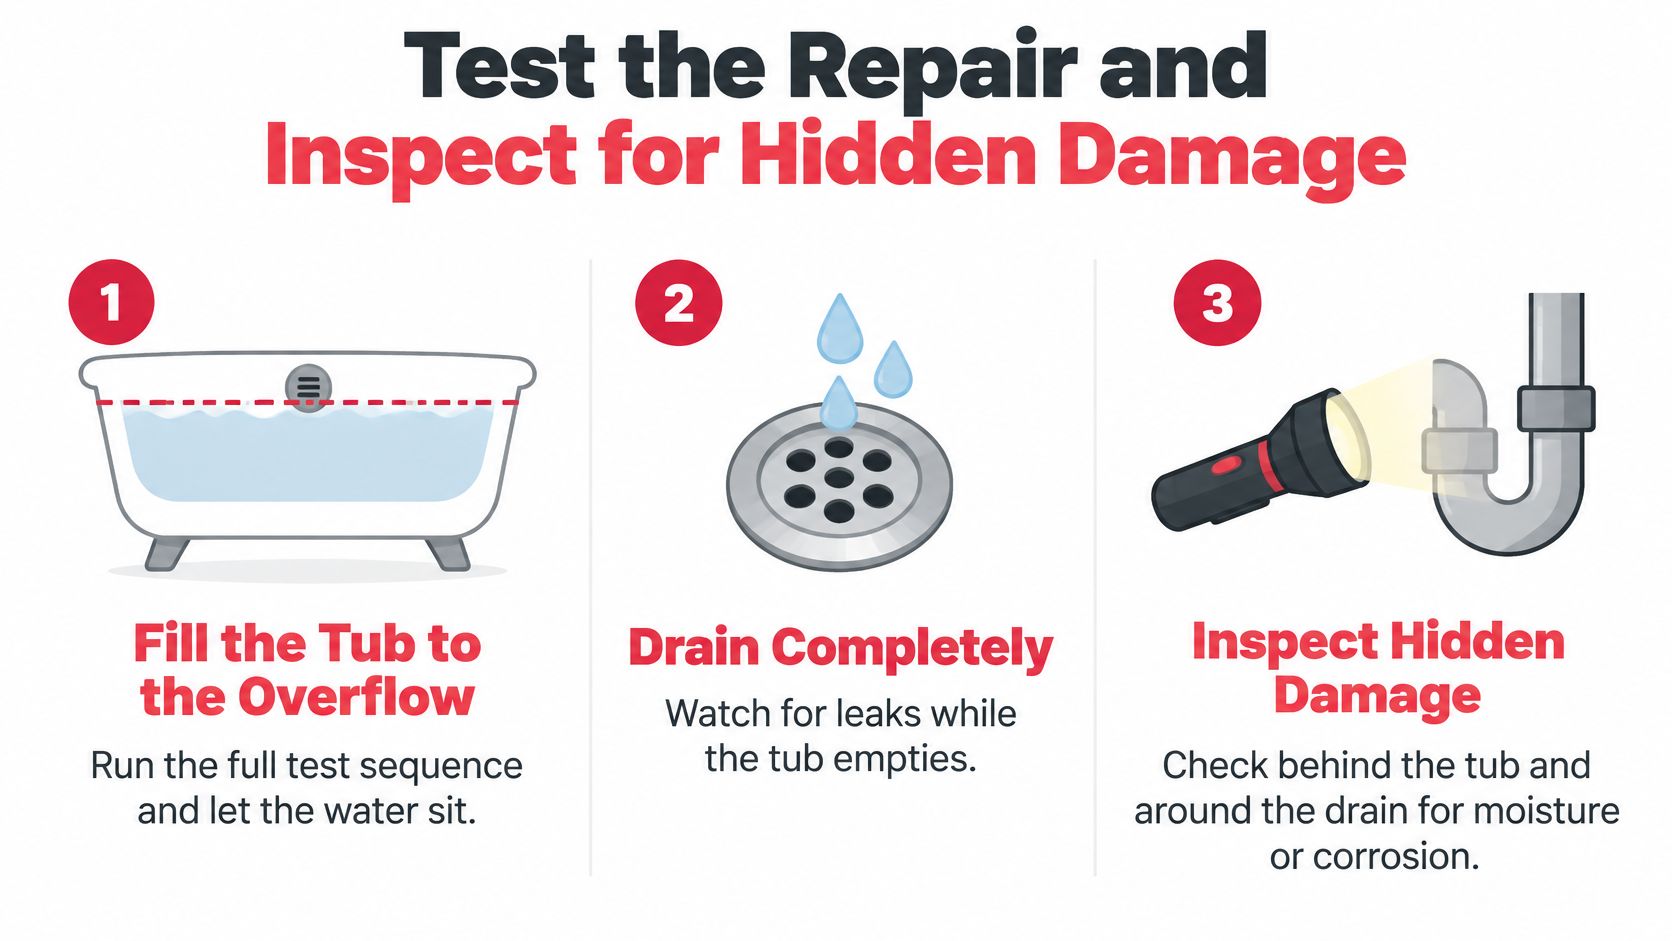
A successful repair must remain dry with water standing in the tub and while the tub empties. Those conditions test different seals and connections, consistent with these bathtub drainage and testing requirements.
Verify before closing access
- Fill and inspect: Repeat the below-overflow and overflow checks, allowing standing water to expose seepage.
- Drain completely: Watch the underside throughout discharge and for several minutes afterward. Operate the stopper as part of the test.
- Separate the shower check: Test the walls and tub-edge area independently so a remaining shower-related leak isn't mistaken for failed drain work.
Use this checklist while inspecting.
If the assembly stays dry but drainage remains poor, treat that as a separate symptom. A clogged bathtub drain assessment can help determine whether a blockage also needs attention. Clearing a blockage doesn't repair a failed seal.
Check what the leak already wetted
Inspect accessible subflooring, drywall, insulation, and framing for moisture, staining, or softness. Photograph affected areas for your records and, where relevant, for your landlord or an insurance claim. Don't patch a ceiling just because the newest paper towel stayed dry.
Before closing up: Confirm both that the plumbing no longer leaks and that previously wetted materials have been assessed.
Caulking over an active leak can hide continuing damage. Keep access available until the plumbing passes its tests and you understand the condition of the surrounding materials.
Know When a Bathtub Drain Leak Needs a Plumber
The DIY boundary isn't whether you own a drain wrench. It's whether you can remove, support, reseal, and inspect the assembly without damaging something you can't reach.
Stop when any of these conditions applies:
- Connections deteriorate under the tool: Corroded cast-iron or mixed-material fittings need assessment before further force.
- The replacement seal still leaks: Recheck alignment, component compatibility, and the fitting itself instead of adding sealant.
- Access requires construction work: Opening finished ceilings or working beneath a slab changes the scope.
- The assembly moves: A rotating shoe or shifting pipe needs support and potentially a broader repair.
- Slow drainage keeps returning: The line may need diagnosis rather than another stopper or flange replacement.
Preserve the drainage system
Don't bypass the trap or improvise a concealed connection to make replacement parts fit. The International Plumbing Code trap provisions require a liquid-seal trap. Stopping the drip isn't enough if the alteration compromises proper drainage.
For local help, MG Plumbing Services is a family-owned, owner-operated, licensed and insured residential plumbing company serving Las Vegas, Henderson, North Las Vegas, Summerlin, and surrounding Las Vegas Valley communities. Owner Miguel Garcia is a Nevada-licensed C-1d plumbing contractor and journeyman plumber with more than 25 years of experience; customers can request same-day residential plumbing service during business hours.
Match the service to the problem
The company provides professional diagnosis, straightforward recommendations, honest pricing, quality workmanship, and flat-rate written estimates. It uses drain-cleaning, hydro-jetting, sewer-camera, locating, and leak-detection equipment to identify causes rather than rely on temporary fixes.
Its residential work includes clogged and slow drains, recurring blockages, main sewer cleaning, sewer and drain diagnosis and repair, water leak detection, water heater repair and replacement, and water treatment. General repairs cover toilets, faucets, sinks, showers, garbage disposals, shutoff valves, hose bibbs, water piping, water-pressure problems, and water softeners.
That scope includes hands-on experience with Southern Nevada hard-water buildup, sewer problems, leaks, and aging plumbing components. Bilingual service is available. Se habla español. The company serves residential customers and doesn't market itself as a commercial or around-the-clock emergency plumbing service.
MG Plumbing Services LLC offers bathtub leak diagnosis, drain repairs, and residential plumbing service when the failed connection is concealed, corroded, or beyond a safe gasket replacement. Call 702-480-8070 or visit MG Plumbing Services LLC to request service, and explain when the leak appears and what you found during testing.