A toilet flowing at 0.5 gallons per minute can waste 21,600 gallons in a month, according to Environmental Protection Agency WaterSense training material, and a continuously running fill valve may waste as much as 4,000 gallons per day. That's why I don't judge a toilet keeps running after flush problem by how loud it sounds. A quiet seep can cost more than an obvious hiss if it runs all day.
Stop swapping parts on a guess. Match the symptom, run one dye test, check the meter, then replace only the part the test convicts.
Table of Contents
- Match Your Symptom to the Likely Cause
- Diagnose the Leak Before Buying Parts
- Check the Chain, Seat, and Flush Valve First
- How to Replace a Flapper Step by Step
- Why Hard Water Makes Running Toilets Worse in Las Vegas
- Fix It Yourself or Call a Plumber
Match Your Symptom to the Likely Cause
A toilet's water loss is a better urgency gauge than its sound. Match the symptom to a likely fault, then test before buying parts.
| Symptom | Likely cause | First check |
|---|---|---|
| Silent trickle into the bowl between flushes | Worn flapper or flush-valve seal | Use a dye test and wait 5 to 10 minutes |
| Tank refills every few minutes | Flapper leak causing refill cycles | Check for dye in the bowl, then watch the tank after a flush |
| Water runs down the overflow tube | Float set too high or fill valve not shutting off | Check whether the water is about 1 inch below the overflow tube |
| Runs only right after a flush, then stops | Flapper not reseating, or chain too tight or too loose | Check chain slack and flapper position |
| Constant hiss with falling tank level | Fill-valve seal failure | Check whether the valve shuts off after adjusting the float |
| Crusty white deposits on the flapper seat | Hard-water mineral scale on seals | Clean the seat and inspect the flapper for stiffness |
Why Sound Misleads You
A worn flapper, faulty flush valve, maladjusted chain, or fill-valve problem can let water pass from the tank into the bowl. A constant leak can waste hundreds of gallons a month, according to EPA WaterSense guidance on toilet leaks.
A quiet leak still deserves prompt attention. The amount lost depends on how much water passes and how long the leak continues, not how loud it sounds.
Practical rule: If the water meter moves when nobody is using water, test the toilet today. Don't wait for the next bill.
If you're unsure which symptom fits, check these frequently asked questions about common plumbing problems. Note how often the tank refills, whether bowl water moves between flushes, and whether the hiss stops. Those details help narrow down the fault.
Diagnose the Leak Before Buying Parts
Run these checks in order. You'll end with a clear fault decision, flapper or fill valve, instead of a bag of parts you didn't need.
The Five Step Test Sequence
- Watch the tank after a flush: Remove the lid and observe for 60 to 90 seconds after flushing. If water keeps entering the bowl once the tank reaches its normal level, inspect the flapper or flush-valve seal for warping, mineral deposits, chain interference, or an incorrect replacement part, as described in EPA WaterSense guidance on toilet leaks, which identifies worn flappers as the most common cause of toilet leaks.
- Look inside the overflow tube: Water flowing over the top means the fill height is too high or the fill valve isn't shutting off. That's a different fault from a tank-to-bowl leak, and a new flapper won't fix it.
- Adjust the float to the marked waterline: The EPA troubleshooting procedure for toilets specifies setting the refill level about 1 inch below the tube's top and lowering the float if the water level is too high. Follow the manufacturer's float adjustment, a screw on top or a squeeze clip on a cup float.
- Run the dye test: Add food coloring or a dye tablet to the tank without flushing and wait 5 to 10 minutes. Color in the bowl confirms a tank-to-bowl leak through the flapper or flush seal.
- Decide the fault: If the bowl stays clear and the tank keeps refilling, suspect the fill valve. If water still rises into the overflow after you adjust the float, replace the fill valve.
Details That Change the Answer
When you replace a fill valve, buy one labeled to ASSE 1002, ASME A112.1002, or CSA B125 standards with an antisiphon device. Confirm the refill tube clips above the overflow opening rather than sitting shoved down inside it. A submerged tube can siphon water and cause constant refilling that looks exactly like a bad flapper.
Don't test immediately after a flush, because residual bowl movement hides a slow seep. Remove any in-tank cleaning tablet before you judge a seal, since those tablets damage rubber. For a sense of what professional diagnosis involves before you commit, see our plumbing cost estimates and what affects pricing.
A passing toilet holds its tank level, shuts off fully instead of cycling, and shows no dye in the bowl after 10 minutes.
If the meter still moves with no fixture running and this toilet passes, test the other toilets next before you go hunting through walls. Toilets are the most common silent leak in a house, and they're the cheapest to rule out.
Check the Chain, Seat, and Flush Valve First
Use this check when the toilet runs only right after a flush and then stops, or when your dye result is borderline. A chain or seat fault costs nothing to fix, so rule it out before you spend on a flapper.
Chain and Flapper Position
Look at the chain with the flapper closed. It should hang with a little slack so it doesn't hold the flapper cracked open or pull it up off the seat. A chain pulled taut is a common reason a toilet runs for a few minutes after every flush, then seals once the flapper settles.
Watch the flapper drop during a flush. It must land squarely on the flush-valve opening and reseat fully. An off-center or warped flapper lets water seep past one edge even if the rubber still feels soft.
Seat Condition
Run a fingertip around the flush-valve seat. You're feeling for:
- White mineral crust: Scrub it with a non-abrasive pad and white vinegar until the ring feels smooth.
- Grit or a rough patch: Wipe it clean, because a single grain under the seal breaks the seal.
- A stiff, chalky flapper: Flex it. If it's lost its softness, cleaning won't save it.
Compare any replacement against the flapper that came out. A different diameter, ear design, or flush-volume rating will still leak even if it looks similar on the store peg. Repeat the dye test after cleaning. If color still reaches the bowl, the seal itself has failed and replacement is the next step.
How to Replace a Flapper Step by Step
The three stages below show why this repair comes first and what you're handling inside the tank.
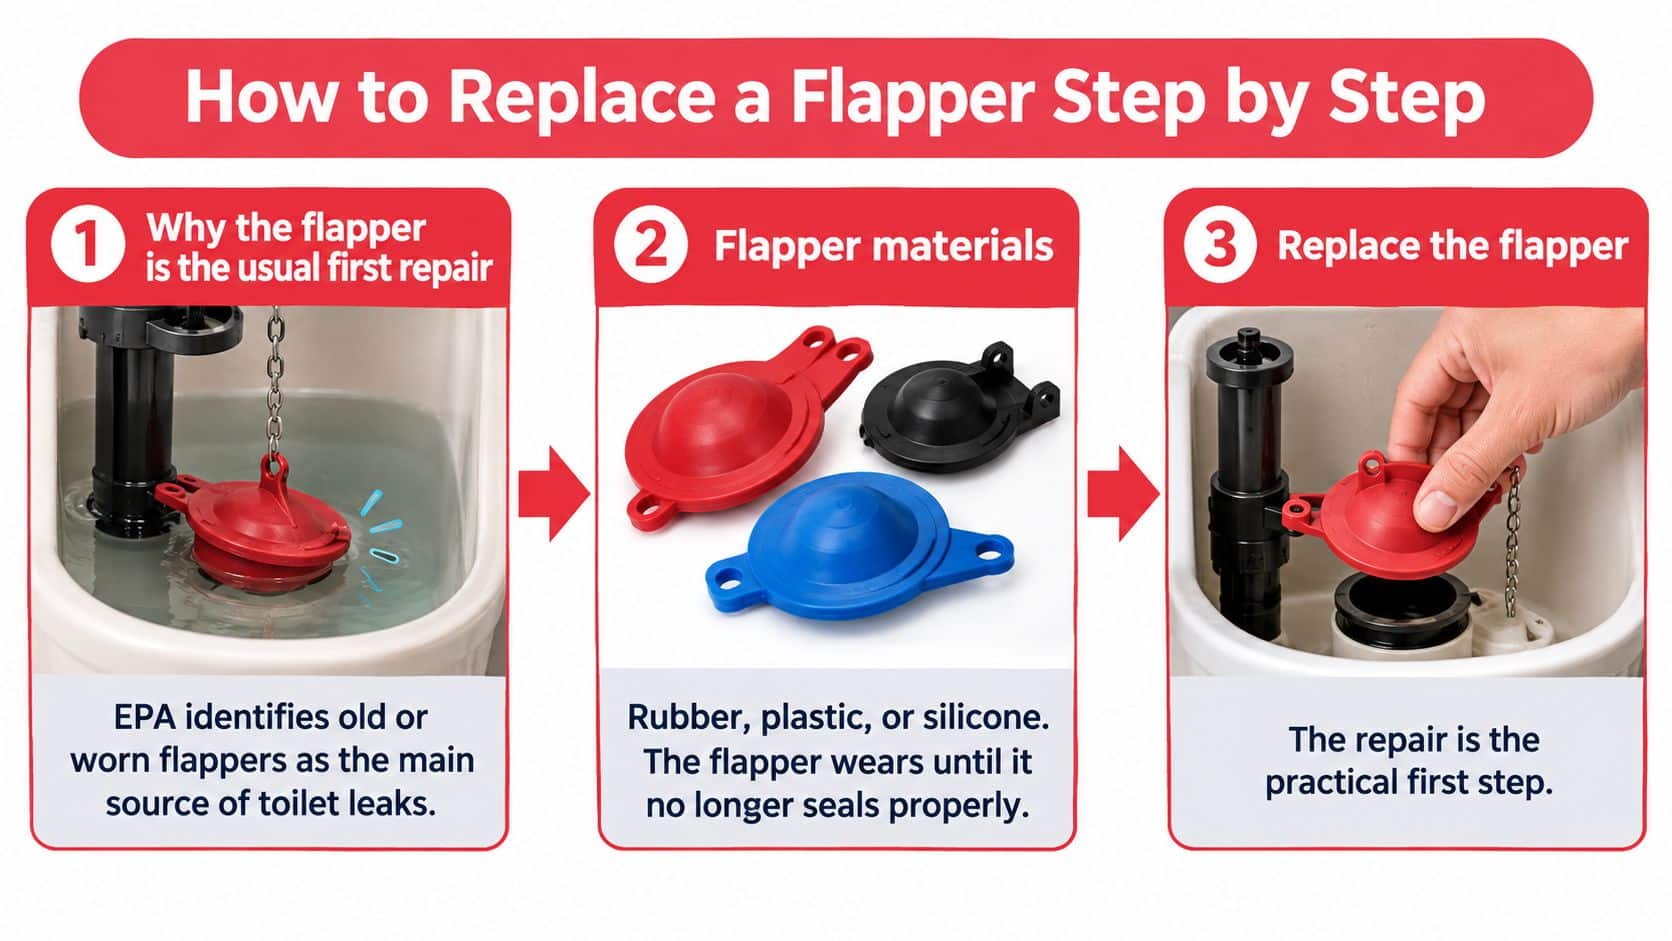
The flapper is the usual first repair for a reason. The U.S. Environmental Protection Agency page on residential toilets states that most toilet leaks result from old or worn flappers, which may be made from rubber, plastic, or silicone. Once the material warps or stiffens, tank water seeps into the bowl and the fill valve keeps cycling to restore the level.
Replacement Steps
- Shut off the stop valve: Turn the oval valve at the wall clockwise, then flush to drain the tank. Hold the handle down to empty as much water as you can, and sponge out the rest if you want a dry work area.
- Remove the old flapper: Unhook the chain from the flush lever arm and unclip the flapper ears from the pegs on the flush valve. Note which hole the chain used on the lever arm before you disconnect it.
- Match the part at the store: Take the old flapper with you and match its diameter, ear or hinge design, and flush-volume rating. Most DIY replacements fail at this step. A universal flapper that almost fits still leaks.
- Clean the seat before fitting anything: Scrub the flush-valve seat with a non-abrasive pad and check for mineral crust. A rough seat stops a brand new flapper from sealing, and you'll blame the new part for an old surface.
- Fit the new flapper: Clip it onto the pegs so it sits centered over the opening. Attach the chain with roughly half an inch of slack and route it clear of the flapper so it can't slip underneath and hold the seal open.
- Refill and cycle twice: Reopen the stop valve slowly, let the tank fill to the marked waterline, and run two complete flush cycles. Watch the flapper drop squarely both times and confirm the fill valve stops fully.
- Prove the seal: Repeat the dye test and wait 10 minutes without flushing. A clear bowl means you're done. Color means the seat, not the flapper, needs attention.
If you want to see the tank parts move through a flush cycle before you start, this walkthrough shows the sequence clearly.
One practical tip saves a second trip. If the tank also hisses while it fills or won't shut off cleanly, replace the fill valve in the same visit while the tank is already drained. I would start with the cheapest fix the dye test supports, but I wouldn't drain the tank twice in one week for two worn parts sitting inches apart.
Don't skip the retest: A flapper that seals on the first flush can still seep an hour later. The 10 minute dye check is the repair, not an extra.
Why Hard Water Makes Running Toilets Worse in Las Vegas
Las Vegas Valley water works against rubber seals. The Las Vegas Valley Water District water quality facts report local hardness of approximately 291 parts per million, equivalent to 17 grains per gallon, from dissolved calcium and magnesium. The district classifies that water as very hard.
Where Scale Attacks the Tank
Minerals build up on the parts that have to seal or shut off:
- Flapper seat: A crusty ring keeps the flapper from seating evenly, so water trickles into the bowl.
- Flush-valve opening: Deposits narrow and roughen the opening the flapper has to cover.
- Fill-valve components: Buildup interferes with the shutoff mechanism, causing periodic refills or a run after every flush.
The symptoms overlap with plain wear. You'll see a trickle into the bowl, a tank that tops itself up at odd hours, or a flapper that looks stiff, chalky, or unevenly seated. Scale can mimic a worn seal, which is why the dye test still comes first. Blaming hard water without testing leads to descaling a toilet that needs a flapper.
Weekend Checks for Southern Nevada Homes
Wipe the flapper seat with a cloth dampened in white vinegar and look for white crust around the flush opening. Flex the flapper between your fingers. Healthy rubber bends easily and feels smooth, while mineral-damaged rubber feels rough and resists bending.
Check every toilet in the house, not just the noisy one. They all drink the same water, so a scaled tank in the primary bathroom usually means the guest bathroom is heading the same way. Catching the second one during the same hour costs you one extra dye test.
Fix It Yourself or Call a Plumber
A toilet can waste water without making a sound. Use the meter to judge the leak, not the noise: with all fixtures off, a moving meter means water is still flowing somewhere. If the meter keeps moving after you've confirmed the toilet is the cause, further part-swapping is unlikely to help.
| Situation | Verdict |
|---|---|
| Dye appears in the bowl and replacing the flapper stops it | Repair yourself |
| The toilet still runs after the flapper and fill valve are replaced | Call a licensed plumber |
| Water appears at the toilet base or on the floor | Call a licensed plumber |
| The tank is cracked | Call a licensed plumber |
| The bowl stays clear, but the meter keeps moving | Call a licensed plumber |
| Several fixtures back up or gurgle | Call a licensed plumber |
What a Professional Visit Adds
Water at the base can point to a wax ring or flange problem, while a cracked tank calls for toilet replacement rather than another seal. If several fixtures back up or gurgle together, the problem may be in the sewer line: a sewer clog can affect multiple fixtures, while a drain clog usually affects one. MG Plumbing Services LLC uses sewer cameras and electronic leak detection to find the source of plumbing problems, and offers toilet replacement and fixture installation. Toilet clog clearing with a closet auger is a flat rate of $107.
MG Plumbing Services LLC is an owner-operated residential plumbing company led by Miguel Garcia, a Nevada C-1d licensed plumbing contractor in the trade since 2000, serving Las Vegas, Henderson, North Las Vegas, Summerlin, and nearby communities. It provides written estimates and same-day appointments during business hours. For non-urgent repairs, request same-day plumbing service in Las Vegas.
Run the dye test and check the meter. If the toilet still leaks after one tested repair, or you find water at the base or a cracked tank, call 702-480-8070 or visit mgplumbingservices.com to request service. Se habla español.
If the toilet keeps running after a tested repair, water is pooling at its base, or the meter keeps moving, MG Plumbing Services LLC can diagnose the fault and handle the repair or replacement. Call 702-480-8070 to schedule residential service in the Las Vegas Valley. Se habla español.